All the code you’ll need for this scenario is in https://github.com/dcvasco/How-to-tips, so let’s just get a quick view of it and talk about the main concepts and its potential utility afterward.
Let’s start by creating an ASP.NET Core Web Application and call it WindowsServiceApiDemo.
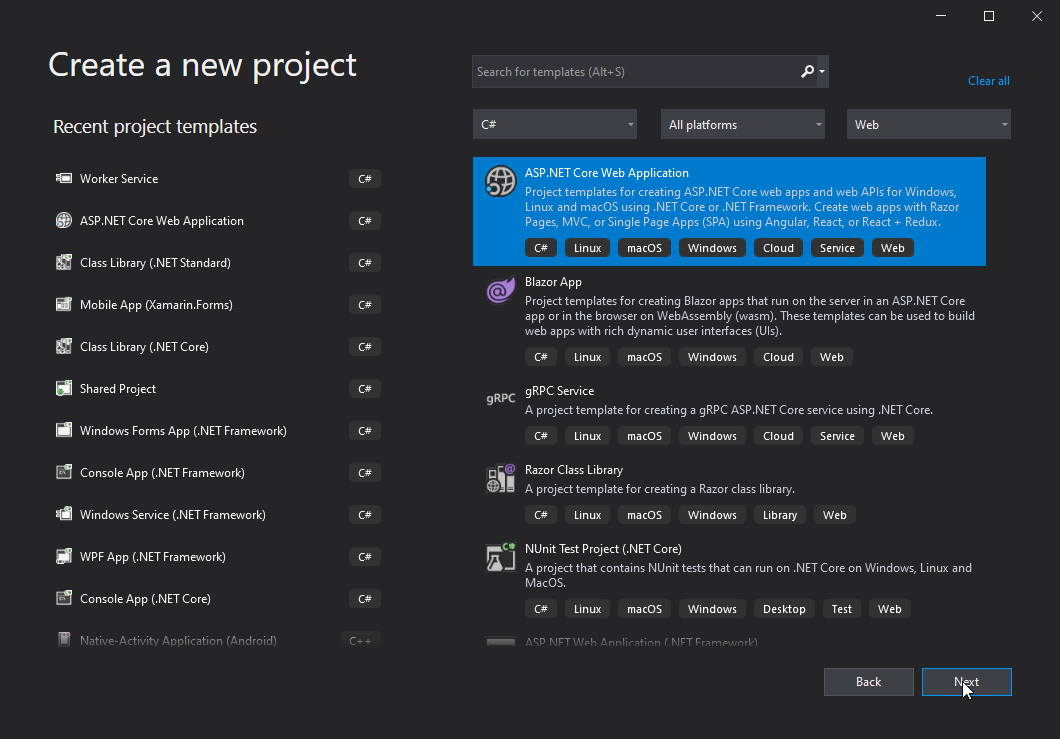
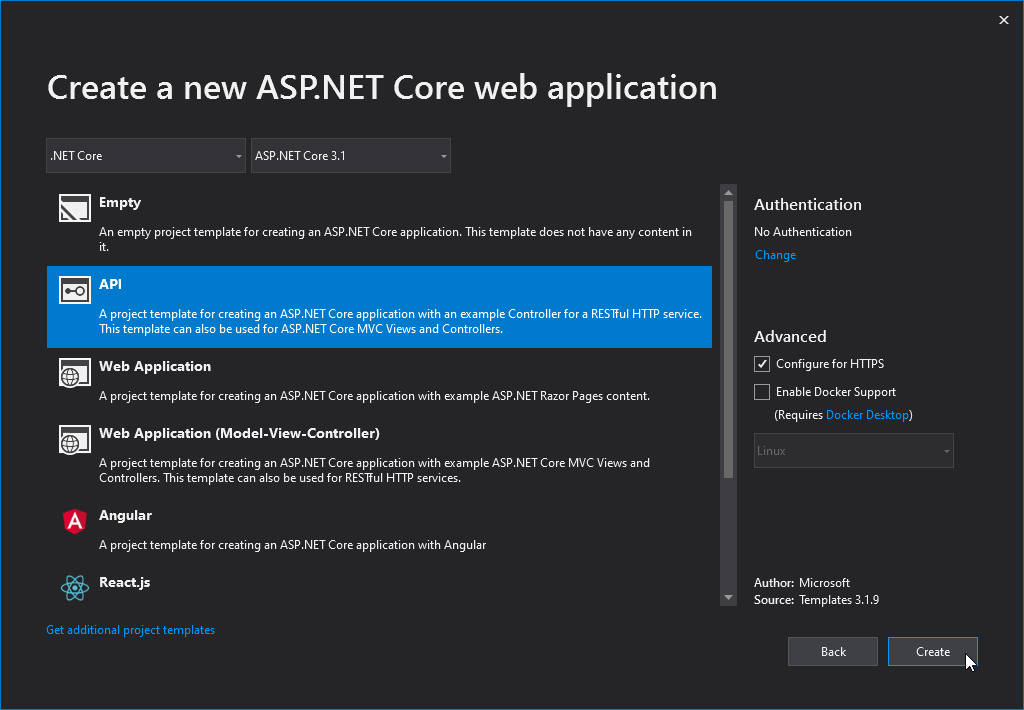
Then choose ASP.NET Core 3.1 and select API.
Afterward, using: Manage NuGet Packages…, install the following NuGets:
- AspNetCore.Hosting.WindowsServices Version 3.1.10
- Extensions.Hosting.WindowsServices Version 3.1.10
- Web.AspNetCore Version 4.9.3
Using Solution Explorer, delete: WeatherForecastController.cs and WeatherForecast.cs.
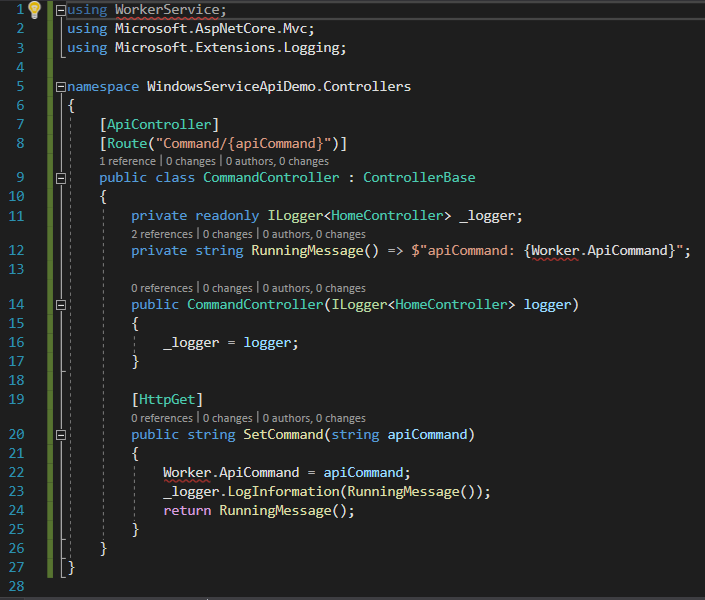
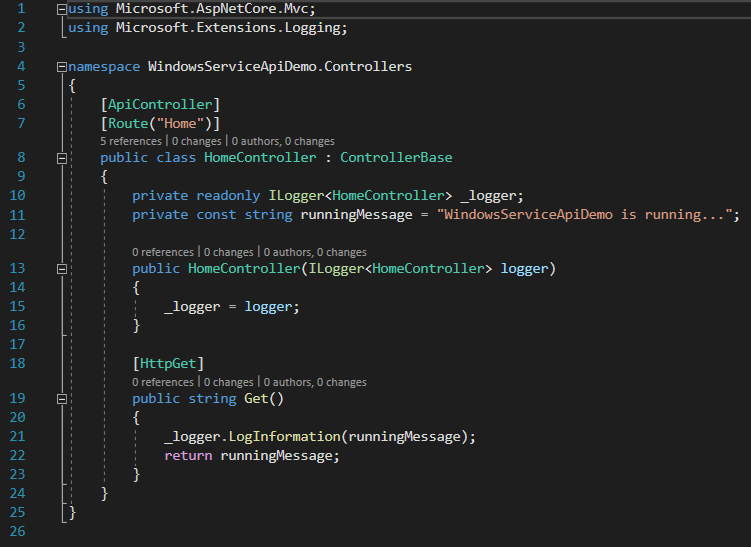
Over Controllers Folder: Add -> Controller… -> MVC Controller – Empty -> Add:
CommandController.cs and HomeController.cs.
Open CommandController.cs and HomeController.cs and change the code as follows:
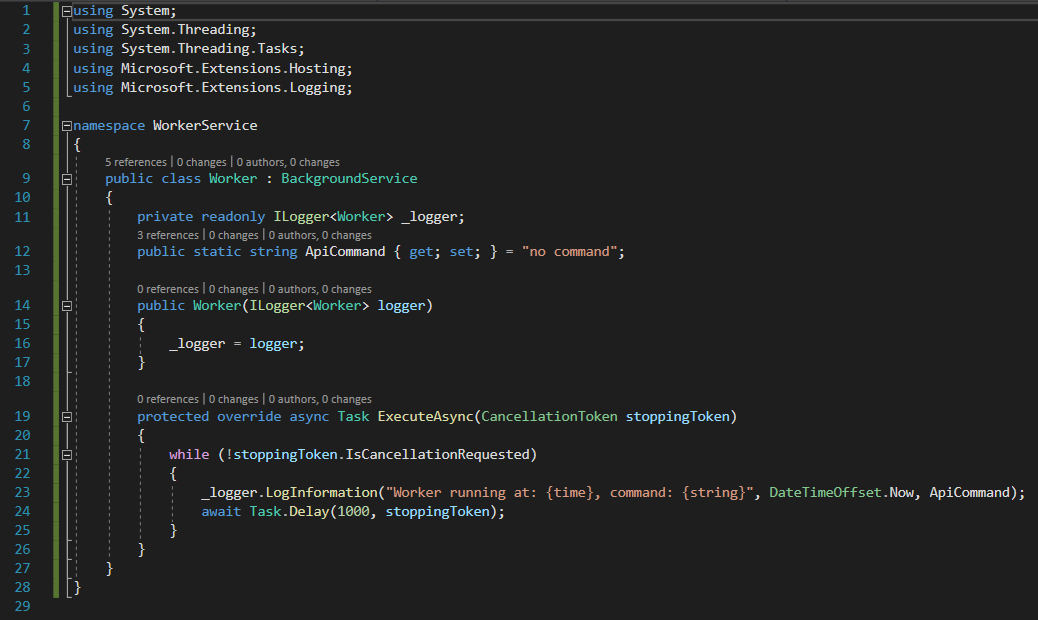
Over WindowsServiceApiDemo do: Add -> Class… -> Worker.cs -> Add.
Open Worker.cs and change the code as follows:
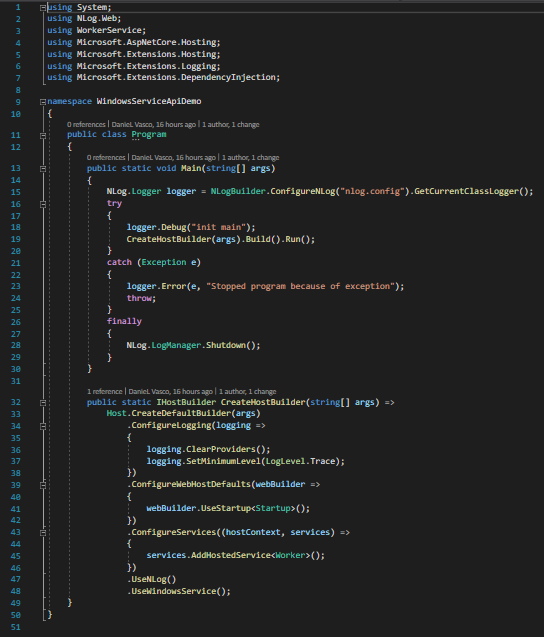
Open Program.cs and change the code as follows:
Inside the “Properties” folder open launchSettings.json and replace “weatherforecast” with “home”.
Over WindowsServiceApiDemo do: -> Add -> New Item… -> Text File -> nlog.config -> Add
On nlog.config, write the code as follows:

c:inetpubservicesWindowsServiceApiDemoAppnetcoreapp3.1logger. Notice that this directory will be created and it’s where we will see the worker acting and responding to our calls.
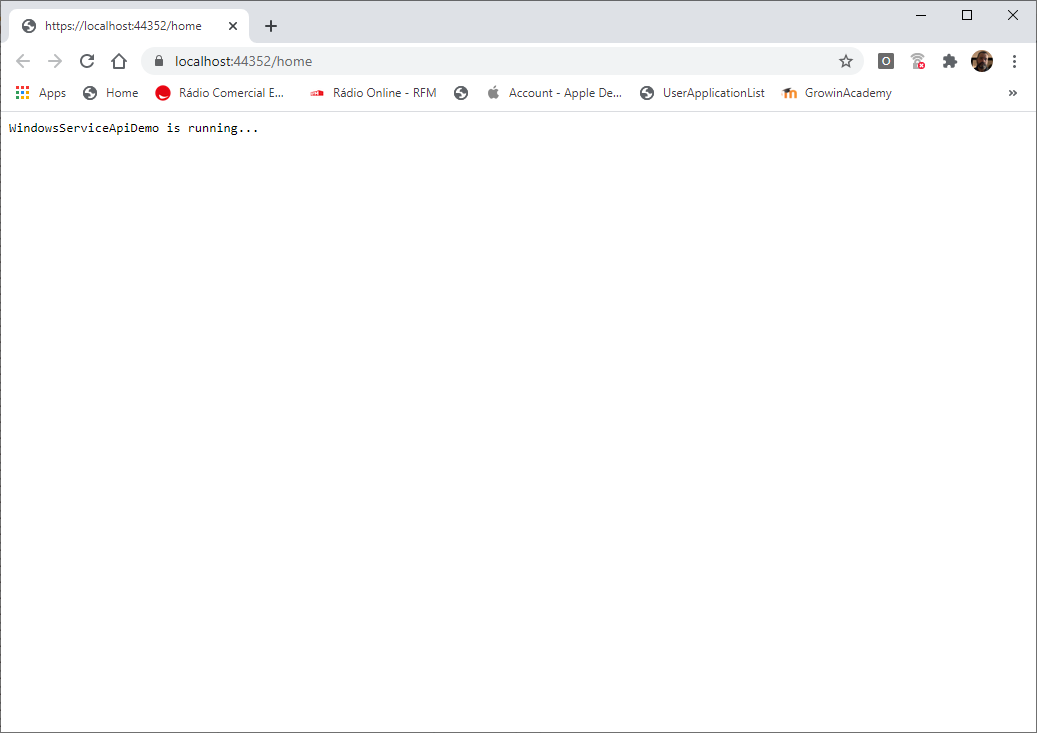
In fact, by now you can run/debug it in Visual Studio. If you do, you will see something like this:
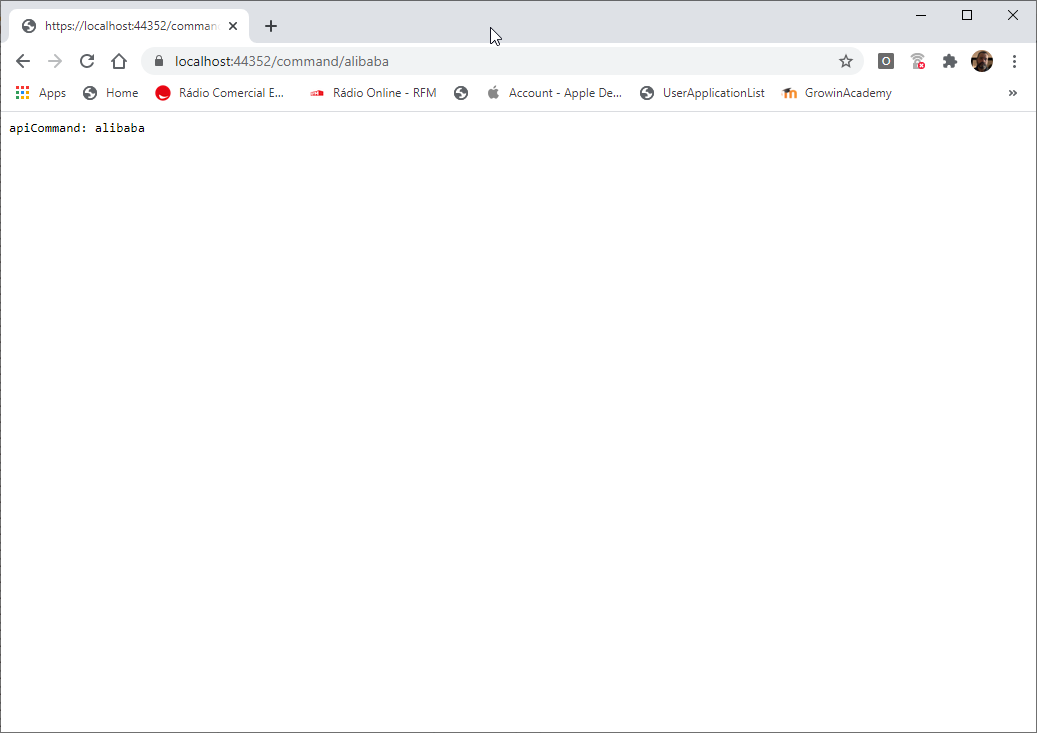
Now change in the URL ‘home’ to ‘command/alibaba’ and press enter. You will see something like this:
Now close the window and open the file inside the path we are using in this example with NotePad++ :
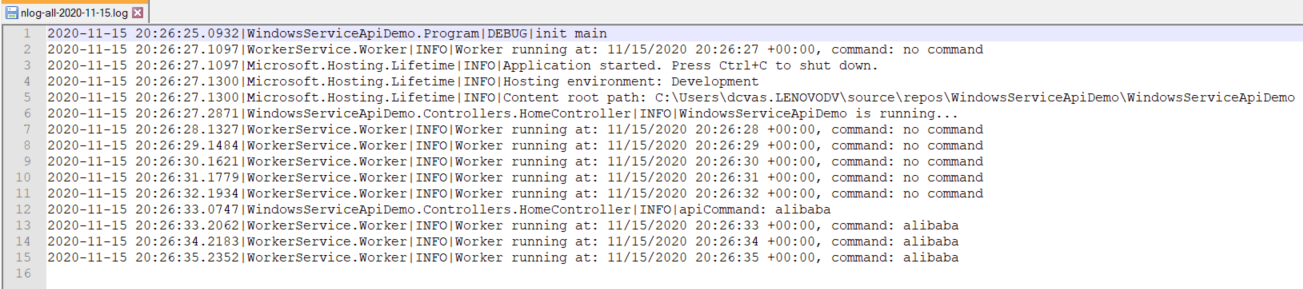
c:inetpubservicesWindowsServiceApiDemoAppnetcoreapp3.1logger, that will be called something like “nlog-all-yyyy-MM-dd.log,” because we are using NLog and the logs will be pleasingly daily independent, you will see something as follows:
We are talking to an API inside a worker and the worker is listening. But it is not running as a Windows Service yet, so let us take care of it:
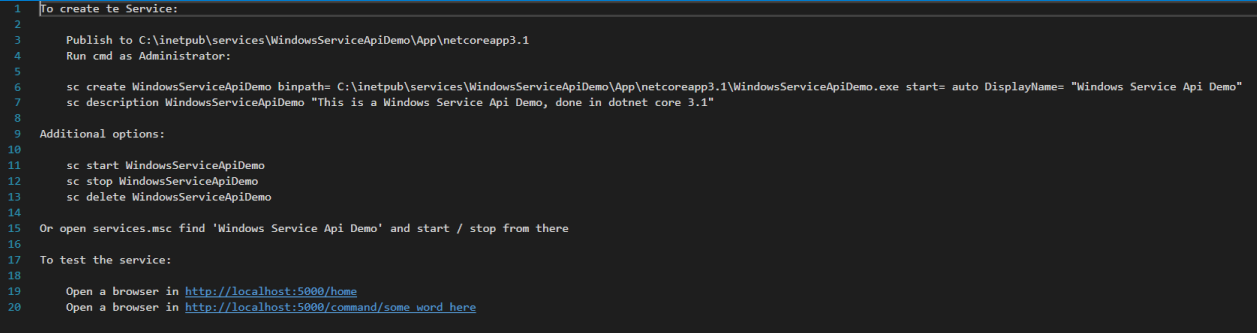
Over WindowsServiceApiDemo -> Add -> New Item… -> Text File -> readme.me -> Add
On readme.me, this will be for your further consulting, write the text as follows:
Once more this is all in GitHub, so just enjoy the ride… Let us publish the thing and make it a Windows Service.
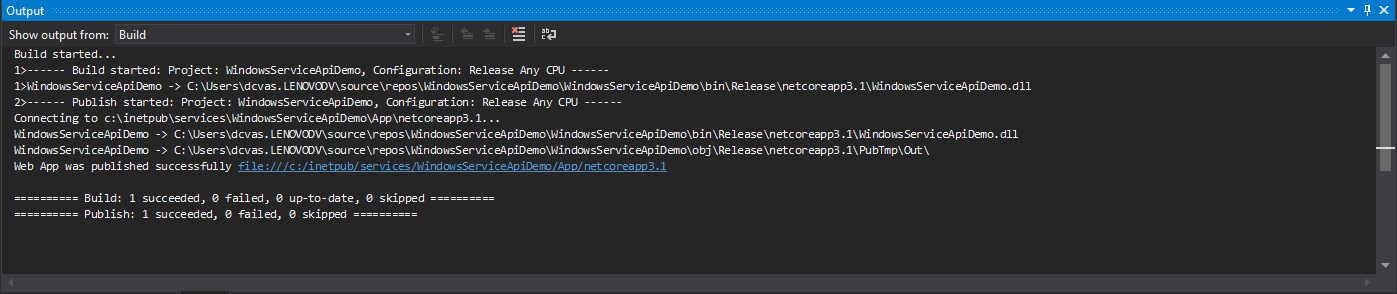
Over the project -> Publish… -> Folder -> Next -> Folder location -> c:inetpubservicesWindowsServiceApiDemoAppnetcoreapp3.1 -> Finish -> Publish.
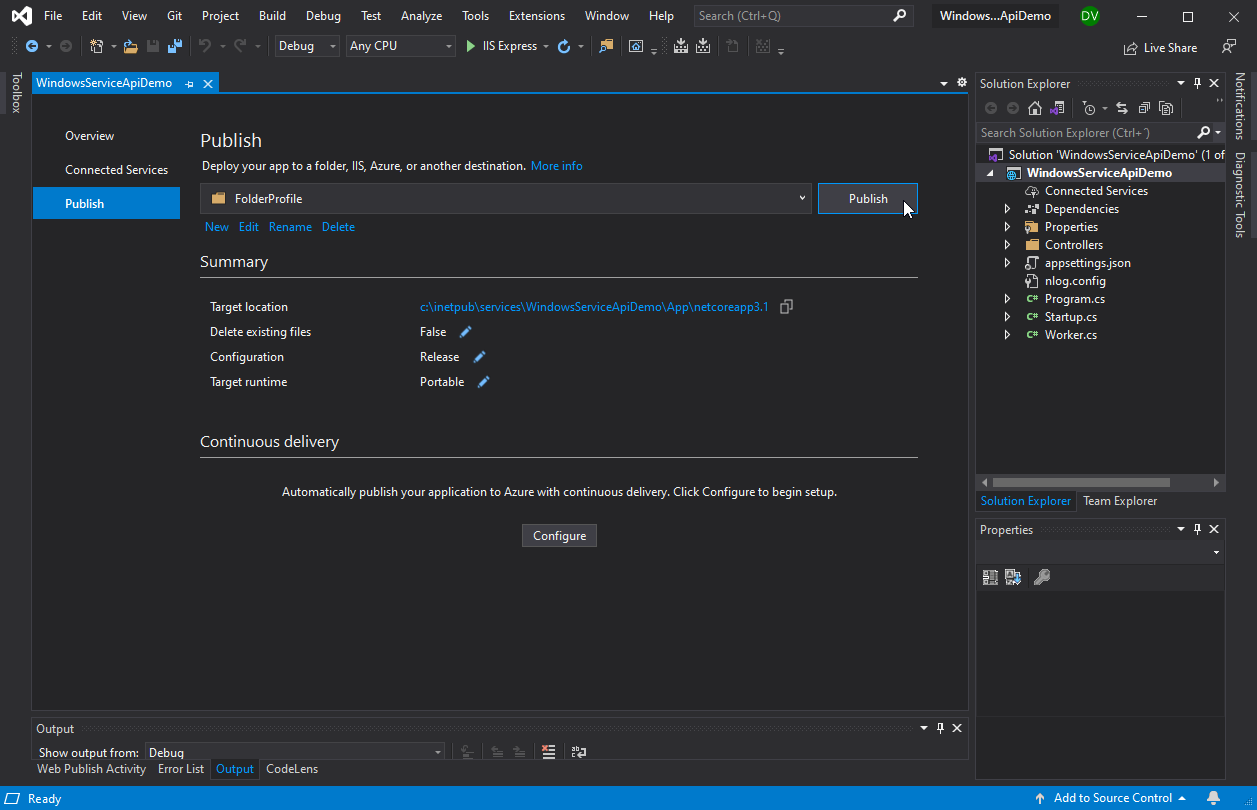
Now it is published to an absolute path that is replicable in a server, which is why I chose c:inetpubservicesWindowsServiceApiDemoAppnetcoreapp3.1.
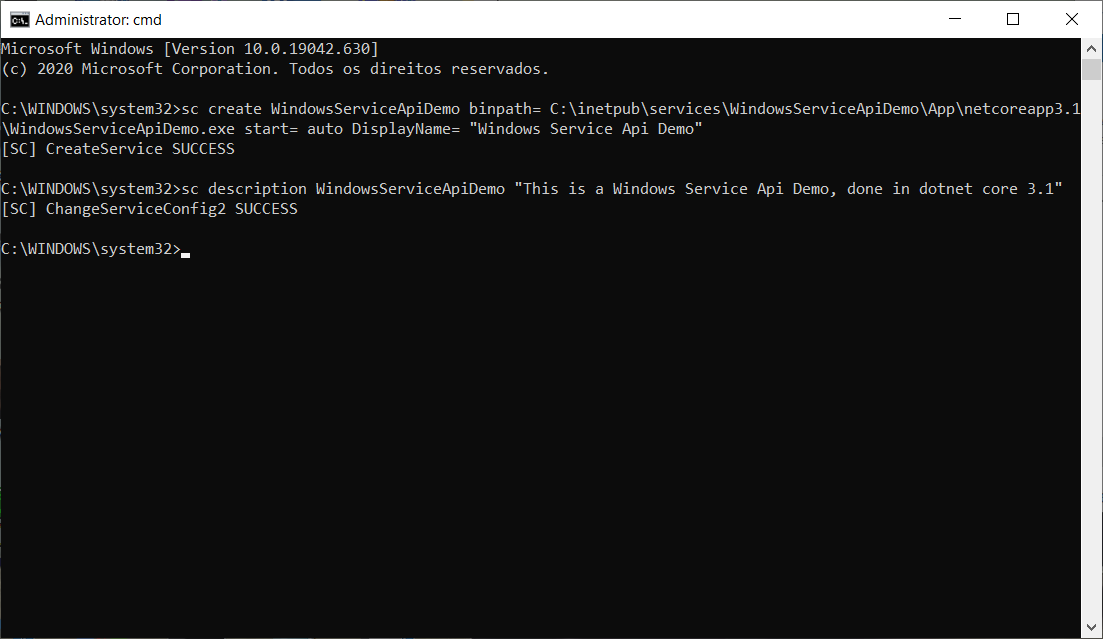
Click Start -> cmd -> run as administrator: write the code as following and press enter:
sc create WindowsServiceApiDemo binpath= C:inetpubservicesWindowsServiceApiDemoAppnetcoreapp3.1WindowsServiceApiDemo.exe start= auto DisplayName= “Windows Service Api Demo”
There is an important space after ‘=’ and it is also important that ‘=’ is leaning ‘binpath’.
Then write the code as follows and press enter:
sc description WindowsServiceApiDemo “This is a Windows Service Api Demo, done in dotnet core 3.1”
Now Click Start -> services.msc -> services.msc -> Star.
This service will automatically start every time the PC or server starts. You can always start and stop it from here.

So, the Windows Service is now running autonomously!
Open a browser and enter the URL: http://localhost:5000/home and then http://localhost:5000/command/alibaba “it is alive! Lol.”
If you still have the NotePad++ opened, just click on it to refresh and you will see the logs updated by the windows service. You can stop it now in Services.msc -> Stop.
You can just copy the full content of the folder: c:inetpubservicesWindowsServiceApiDemoAppnetcoreapp3.1 to the server in the same absolute path and create the service as described before.
If you want, and you will need it in a real scenario, you can change this path, but it is advisable to keep it the same in-development PC and server.
Also, you need to update it in readme.me commands, so you would not make any mistakes when creating the Windows Service both locally for testing and in the server to really be of some use.
What we did here, and you can go carefully over the code and see, was create a worker over an API project, use NLog, a very powerful tool that here is used just to see the Windows Service working, and use this very simple example as a base to build something useful.
If you can talk with a Windows Service from an application, you can program it to receive orders to do something at a scheduled time, pass you a file to process, etc.
I used this technique in .NET Framework 4.7.2 to solve a real problem before: A Web application was used to upload files that were processed asynchronously to update a database in a very time-consuming process, that’s why it was done asynchronously otherwise the application would be frozen for a while. So, people got uploading another and another and another, without any mercy at all, and the Entity Framework started overloading the SQL with demands.
The result was a rollback and all work lost. So, by sending the files, in base64, to the Windows Service API, they were pushed into a queue that the Windows Service itself was looking at and picking one by one at a time to process it. Problem Solved!
But I am sure that this tool does have a lot more potential roles to explore.
I hope you enjoy it, and that might be useful to somebody the way it was to me.